
The correct chemical depends on the stain: an alkaline degreaser for oil and grease, diluted sodium hypochlorite for algae and mould, and a general detergent for everyday grime. Whichever you choose, never let it dry on the surface before rinsing. Pre-treatment lifts contamination chemically, so you need less pressure to finish the job, which means less risk of etching or scarring the concrete.
TL;DR:
- Using the correct chemical for each stain type, such as alkaline degreasers for oil and sodium hypochlorite for mould, improves cleaning efficiency and prevents surface damage.
- Dwell times vary between 5 to 20 minutes depending on the stain, with precautions like misting water to prevent chemical drying and residues.
- Proper application methods, like foamers for vertical surfaces and tip-mounted injectors for concentrated chemicals, influence both safety and effectiveness.
- Safety measures include PPE, runoff containment, and neutralising acids or chlorine before environmental release to protect people and nearby plants.
- Larger or commercial jobs require professional assessment, hot-water equipment, and tailored treatment plans to handle ingrained grime or extensive stains.
Table of Contents
- What chemicals actually work for pressure washing pre-treatment.
- How do you know which chemical a stain needs?
- Choosing the right application method and equipment
- How long should pre-treatment sit before rinsing?
- Keeping people, plants and waterways safe during pre-treatment.
- What comes after pre-treatment: washing, neutralising and sealing
- When the job’s too big for a weekend and a garden hose
- Get a professional assessment for larger concrete cleaning jobs
- Sources
- FAQ
What chemicals actually work for pressure washing pre-treatment.
Matching the chemical to the stain is the whole game. Get this wrong and you either waste product or damage the surface trying to blast away something a chemical would have lifted in minutes.
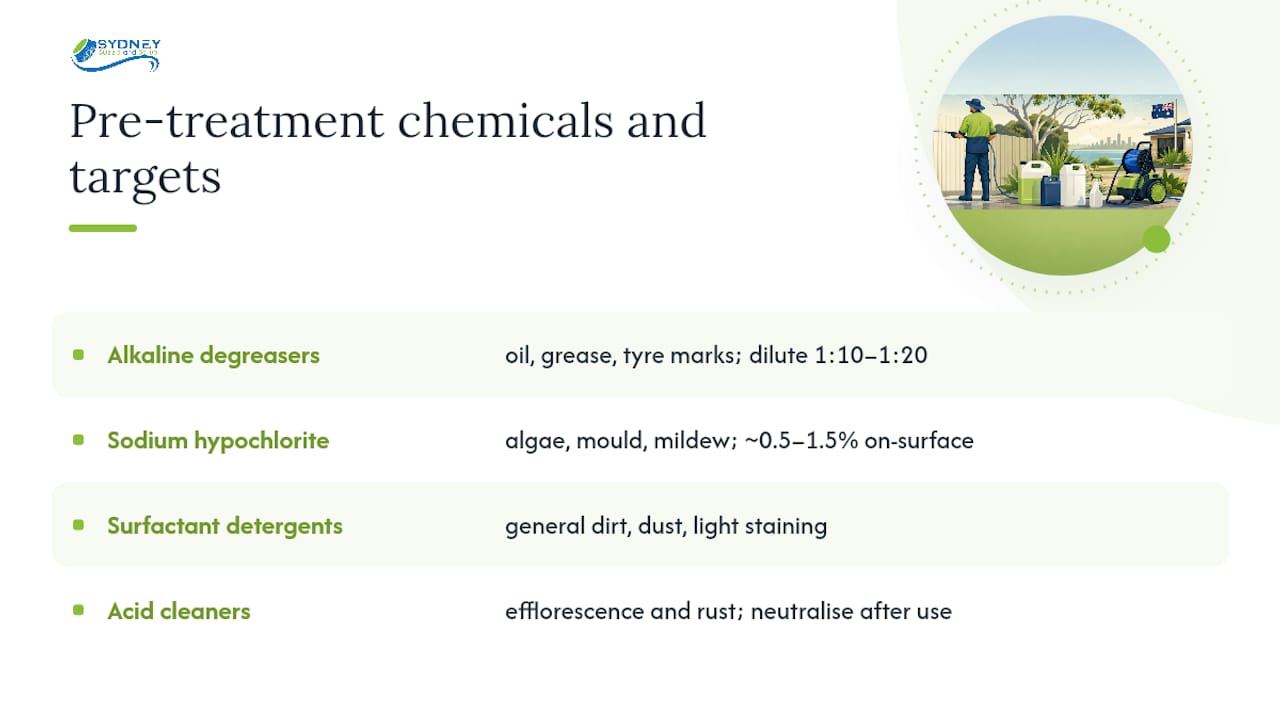
Alkaline degreasers handle oil, grease, and tyre marks. These products break the bond between hydrocarbons and concrete pores through saponification, essentially turning grease into something water-soluble. Most concentrates are diluted between 1:10 and 1:20 with water, though pretreating concrete before pressure washing consistently produces more even results than trying to muscle through with pressure alone.
Sodium hypochlorite (the same active ingredient in household bleach, but usually applied at commercial strength) is the standard for algae, mould, and black mildew streaks. Professionals typically dilute concentrated stock to a final on-surface strength of roughly 0.5 to 1.5 percent, depending on the product and how established the growth is.
Surfactant detergents and commercial concrete cleaners cover general dirt, dust, and light staining where nothing biological or oily is involved.
Acid cleaners target efflorescence, the chalky white mineral bloom that leaches out of concrete, along with rust stains. These always need neutralising afterwards.
Skip the supermarket cupboard entirely. Dish soap, vinegar, and general household cleaners lack the concentration to do real work, and vinegar’s acidity can etch concrete with no benefit to show for it.
How do you know which chemical a stain needs?
Reading a stain correctly before you reach for a bottle saves you a wasted application and a second trip to the hardware store.
- Check if oil is fresh or set. A fresh, dark, slightly tacky patch responds to a standard degreaser. An old, dry, sunk-in stain that’s been there for months often needs a poultice: chemical applied, covered with an absorbent material, and left for 24 hours, sometimes repeated more than once.
- Identify biological growth by colour and texture. Green means algae, black or dark grey usually means mould or lichen. Both call for diluted sodium hypochlorite.
- Spot efflorescence by its powdery white bloom. If it brushes off dry and reappears after rain, it’s mineral salt, not dirt, and needs an acid cleaner.
- Look for rust as an orange-brown ring, usually near metal fixtures, garden furniture, or reinforcing bar bleeding through.
- Always test a small, hidden patch first, wait the full dwell time, and check for discolouration before treating the whole area.
- Pre-wet the surface with plain water on hot days so the chemical doesn’t evaporate before it can work, and agitate stubborn spots with a stiff broom to help the product penetrate.
Choosing the right application method and equipment
The chemical is only half the job. How you get it onto the concrete affects both the result and the safety of your pressure washer.
- Pump sprayers suit small driveways and spot treatments, giving you full control over concentration.
- Foamers cling to vertical surfaces like walls and fences, extending contact time where gravity would otherwise wash the chemical straight off.
- Downstream injectors pull chemical through the machine at low pressure, but they dilute it heavily, which suits light maintenance washes rather than stubborn stains.
- Tip-mounted injectors, often called an X-Jet, apply chemical at much higher concentration and bypass the pump entirely, which matters for corrosive products like sodium hypochlorite.
Hot water accelerates grease removal when paired with alkaline degreasers, but check the technical data sheet first. Not every product is rated hot-water stable, and some decompose or lose effectiveness above certain temperatures. Sydney Sweep and Scrub’s guide on pressure washing with hot water covers when that extra heat is worth it.
Pro Tip: Always measure concentrate with a proper mixing container, not by eye. A slightly weak mix just means a longer dwell time. An overly strong mix can bleach concrete or kill grass you never intended to touch.
How long should pre-treatment sit before rinsing?
Dwell time is where most DIY attempts go wrong, either rinsing too soon or leaving the chemical to bake dry in the sun.
- General grime and detergent washes: 5 to 10 minutes
- Algae and mould treatments: 10 to 15 minutes
- Oil and grease degreasers: 10 to 20 minutes
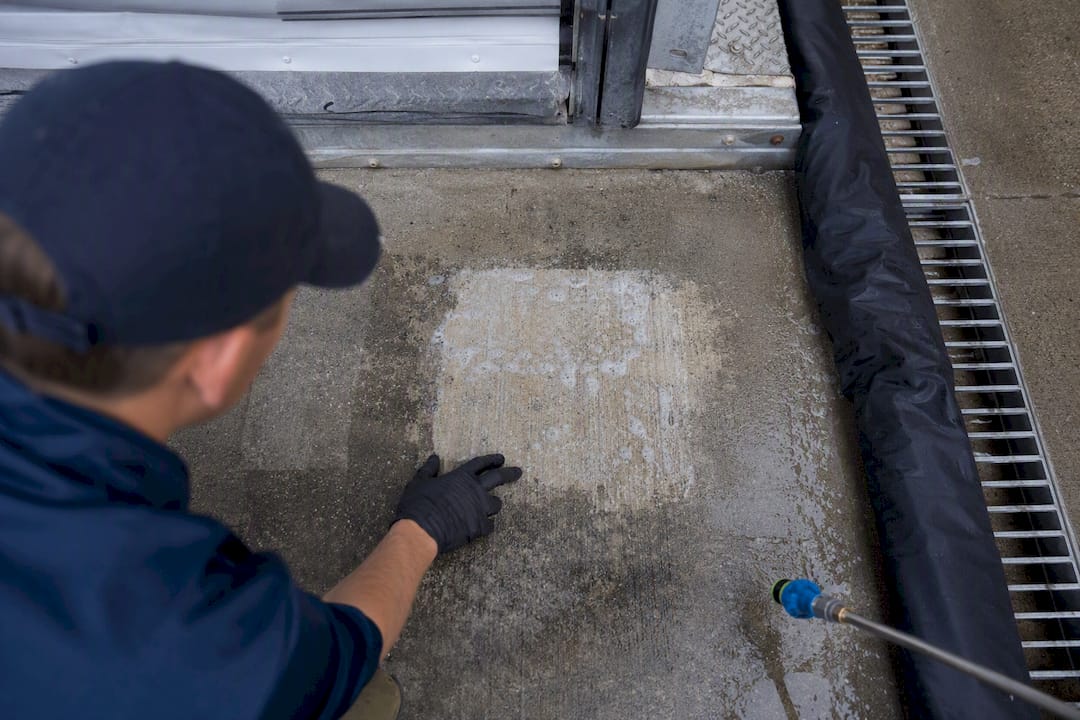
If the surface starts drying out before the dwell time is up, mist it lightly with plain water from a hand sprayer to keep the chemical active. A solution that dries on concrete tends to leave a chalky white residue that’s genuinely harder to shift than the stain you started with.
You’ll know the treatment has worked when the stain visibly lifts or lightens and the surface looks slightly foamy or discoloured where the contamination was breaking down. If nothing’s changed after the full dwell time, the chemical was too weak, the stain is older than it looks, or you need a second application rather than more pressure.
Keeping people, plants and waterways safe during pre-treatment.
Safety and environmental controls aren’t optional extras bolted onto the job. They’re part of doing it properly, and Safe Work Australia’s guidance on high pressure water jetting treats pre-start checks and hazard assessment as core steps, not afterthoughts.
Before opening a single bottle, read the safety data sheet. It tells you the correct PPE, whether the product reacts badly with other chemicals, and what to do if it contacts skin or eyes. At minimum, wear:
- Chemical-resistant gloves
- Safety glasses or a face shield
- Closed footwear
- Long sleeves and trousers when handling concentrated sodium hypochlorite
Heavily saturating grass, garden beds, and surrounding soil with plain water before, during, and after chemical application dilutes any runoff and is the single most effective way to stop sodium hypochlorite or strong alkalis from killing nearby plants.
Contain runoff so it doesn’t run straight into a stormwater drain, particularly with acid or chlorine-based products. Sodium thiosulfate can neutralise chlorine-based runoff where local rules call for it. Shine Wise’s pressure washing safety guide covers pre-start controls in more depth if you want a second checklist to work from, and Sweepandscrub’s own notes on common mistakes to avoid when pressure washing walk through the same ground from a different angle.
What comes after pre-treatment: washing, neutralising and sealing
Pre-treatment sets up the wash, but the finishing steps decide whether the result looks professional or patchy.
- Drop the pressure and use a surface cleaner attachment on flat driveways and paths. The spinning bar distributes pressure evenly and avoids the tiger-striping you get from a single-jet wand held too long in one spot.
- Rinse in overlapping passes, always moving in the same direction, working from the highest point down so dirty water doesn’t run back over cleaned concrete.
- Neutralise any acid cleaner before it dries, then rinse thoroughly, particularly near garden beds and lawn edges.
- Consider sealing the concrete once it’s fully dry, typically 24 to 48 hours later, and reapply sealer every two to three years depending on foot and vehicle traffic.
When the job’s too big for a weekend and a garden hose
Some jobs are genuinely outside DIY scope. Large commercial car parks, warehouse floors soaked in years of tyre and oil residue, or any surface where restricted access or safety risk comes into play all call for professional equipment.
Training standards like PRMCL20B cover exactly this: assessing the surface, selecting the right chemical and dilution, running pre-start checks, and protecting people and property throughout the job. That’s the level of control a professional operation brings that a hire-shop pressure washer and a bottle of degreaser can’t match.
Professionals also carry hot-water units, tip-mounted injectors for concentrated spot work, and proper runoff management plans, all of which matter more as the job scales up from a driveway to a full car park or loading dock.
Get a professional assessment for larger concrete cleaning jobs
There’s real skill in reading a stain and picking the right chemistry, but scale changes the equation fast. A single oil patch in a driveway is a Saturday job. A warehouse floor with years of tyre marks, or a car park with hundreds of square metres of set-in grime, needs commercial-grade dilution control and hot-water capability that most homeowners simply don’t have access to.
Professional operators handle both ends of that spectrum, from hot-water and cold-water pressure washing to eco-friendly treatment options for sites where runoff control matters. A typical quote starts with a site assessment: what’s causing the stain, which chemical and dilution suits the surface, how to protect any nearby garden beds or waterways, and what containment the runoff needs before a single litre of chemical goes down. For larger concrete areas where grease and set-in grime are the main problem, hot-water pressure washing is usually the fastest way to a clean result without excessive pressure. Book a site assessment or request a quote through the relevant service provider to find out which approach fits your job.
Sources
- Pressure Washing Chemicals Guide: Types, Uses & Selection Tips
- How to Choose the Right Concrete Cleaner | J.Racenstein
- Guide for managing risks from high pressure water jetting
FAQ
What should I do to pre-treat my driveway before pressure washing?
Identify the stain type first, then apply a matching chemical (degreaser for oil, diluted sodium hypochlorite for algae or mould) and let it sit for the recommended dwell time before rinsing.
What should I spray on a house before power washing?
House exteriors typically need a milder surfactant detergent or diluted sodium hypochlorite for mould and algae, applied with a low-pressure sprayer and rinsed thoroughly, with plants pre-wetted first to prevent chemical damage.
What should I put on bricks before pressure washing?
Bricks respond well to a diluted sodium hypochlorite solution for organic growth or a mild alkaline cleaner for general grime, but always patch-test first since some brick finishes are sensitive to strong chemicals.
What should I do to treat concrete after pressure washing?
Rinse thoroughly to remove any remaining chemical residue, neutralise acid cleaners if used, let the surface dry fully for 24 to 48 hours, and consider sealing to protect against future staining.