
For most driveway and garage oil marks, act fast: absorb the spill, then degrease. Older stains need a poultice or professional extraction. The method that works depends entirely on how long the oil has been sitting, because fresh oil sits on the surface while old oil soaks deep into the pores of the concrete.
Three paths, sorted by age:
- Fresh spill (hours old): absorb with clay cat litter or bicarb soda, then degrease and rinse downhill.
- Set-in stain (days to months): apply an alkaline degreaser, scrub hard, rinse, repeat.
- Embedded stain (months to years): build a poultice or bring in hot-water pressure washing for genuine extraction.
Poultice treatments typically need a 24 to 48 hour dwell time to draw oil out of the pores, and even then, some jobs need two or three cycles before the shadow fades. Wear gloves and work in ventilated conditions any time you’re using solvents, and know that heavily soaked slabs sometimes need a professional to manage the containment and runoff properly.
Key Takeaways
The right oil stain removal method for concrete depends on stain age: absorb fresh spills, degrease set-in marks, and poultice or extract embedded contamination.
| Point | Details |
|---|---|
| Match method to stain age | Absorb fresh spills within hours, degrease set-in stains, poultice or extract embedded ones. |
| Never rinse a fresh spill first | Water spreads oil sideways and drives it deeper into the concrete’s pores. |
| Poultice needs a full dry-down | Judge results only after the paste has fully dried and been scraped away, typically 24 to 48 hours. |
| Prep the surface first | Sweep debris and confirm the concrete is dry before applying any degreaser or poultice. |
| Call a professional for scale or recurring leaks | Sydney Sweep and Scrub’s hot-water extraction and mechanical scrubbing handle large or persistent stains DIY can’t shift. |
Table of Contents
- Quick fix for fresh oil stains on concrete (0 to 48 hours)
- How do you remove set-in oil stains from concrete?
- Removing embedded oil stains from concrete with a poultice
- When to use pressure washing or hire a professional
- Getting the concrete ready before you treat any stain
- Not all oil stains behave the same way
- Mistakes that make oil stains on concrete worse
- Tools and equipment worth having on hand
- Keeping oil stains from coming back
- How Sydney Sweep and Scrub handles stubborn oil stains
- Sources
Quick fix for fresh oil stains on concrete (0 to 48 hours)
Never reach for the hose first. Water spreads oil across the surface and pushes it further into the pores, turning a small mark into a bigger problem. The first move is always dry absorption, not liquid.
Clay cat litter, bicarb soda, or cornstarch all work as absorbents because they wick the oil up and out of the surface before it has a chance to cure. Crush the litter into a coarse powder, pour a generous layer over the stain, and press it down firmly with a piece of timber or the flat of your boot. Leave it for at least 15 to 20 minutes, then sweep it up. If the patch still looks dark or greasy, repeat with a fresh layer. Oil that’s less than a day old often lifts almost completely at this stage.
Once the bulk of the oil is gone, degrease what’s left behind:
- Apply undiluted dish soap or a light concrete detergent directly to the stain.
- Let it sit for 5 to 15 minutes; don’t let it dry out on hot concrete.
- Scrub with a stiff bristle brush in small circles to break the oil film loose.
- Rinse in one direction, following the slab’s natural slope, so you’re not dragging oily water back across clean concrete.
Pro Tip: Keep a bag of clay cat litter in the garage or shed year round. Treating a spill within the first hour, before it has time to bond with the surface, is the single biggest factor in whether it disappears completely or leaves a shadow.
Bag up the used absorbent and any oily rags rather than tipping them in general rubbish or hosing them into a drain. Gloves and eye protection are worth wearing even for this early stage, since concentrated degreasers can irritate skin on contact.
How do you remove set-in oil stains from concrete?
A stain that’s been sitting for a few days or months behaves differently to a fresh spill. It’s no longer just sitting on top. It’s settled into the surface texture and started to oxidise slightly, which is why plain dish soap often stops working and you need something with more punch.
The first job is diagnosis. Run your hand over the mark. If it still feels slightly greasy or tacky, you’re dealing with surface film that responds well to degreasing. If it’s dry, dull, and matte compared with the surrounding concrete, the oil has already started migrating deeper and you may need to jump ahead to the poultice method.
For genuine set-in stains, look for a concrete-specific alkaline degreaser or an enzyme cleaner rather than a generic household product. Southside Supplies recommends dedicated oil removers over general detergents precisely because they’re formulated to break the bond between hydrocarbons and cured concrete, and repeated extraction cycles are often necessary rather than optional.
- Follow the label’s dwell time exactly. Most sit for 10 to 60 minutes.
- If the product starts drying out before that window ends, cover it with plastic sheeting to keep it working.
- Scrub with a stiff nylon brush, working the product into the pores rather than just across the surface.
- Protect nearby garden beds or lawn from runoff before you start, since these degreasers aren’t kind to plants.
Stop after three or four cycles if you’re seeing no further lightening. Continued scrubbing at that point risks etching the surface rather than shifting more oil, and an etched patch is often harder to fix than the original stain.
Removing embedded oil stains from concrete with a poultice
Old, deeply embedded stains need a completely different approach. Surface cleaning can’t reach oil that’s migrated centimetres into the concrete, which is why scrubbing harder or applying more degreaser rarely helps once a stain has been there for months or years. A poultice works by reversing the process that caused the problem in the first place: it draws the oil back out through capillary action instead of trying to break it down on the surface.
The classic mix is an absorbent powder (diatomaceous earth, fuller’s earth, or even powdered cat litter) combined with a solvent or a premixed poultice product, blended to a paste roughly the consistency of peanut butter. Sealers Plus sells a ready-made version if you’d rather skip the mixing.
- Spread the paste 6 to 12mm thick over the stain, extending at least 5cm past the visible edges.
- Cover completely with plastic sheeting and tape down the edges to slow evaporation.
- Leave it undisturbed for 24 to 48 hours, longer for very old or heavy contamination.
- Remove the plastic and let the poultice dry out completely before scraping it away. This is the step people rush, and it’s the one that determines whether the treatment actually worked.
- Only judge the result once the area is fully dry. A poultice can look like it’s failed while still damp and then reveal a much lighter stain underneath.
Pro Tip: Don’t mix a solvent-based poultice indoors or in an enclosed garage without cross ventilation. GSA technical guidance on poulticing petroleum stains specifically flags solvent fumes as a hazard, and gloves alone won’t protect you from breathing them in.
Bag the dried, scraped-off poultice material as chemical waste rather than general rubbish, particularly if you used a solvent-based mix.
When to use pressure washing or hire a professional
Surface cleaning and deep extraction solve different problems. A degreaser and a brush shift oil sitting in the top few millimetres of concrete. Getting oil out of pores several centimetres down needs heat, specialised surfactants, and equipment most homeowners don’t own, which is exactly the gap professional hot-water extraction fills.
Heat matters because it lowers the viscosity of heavy oils like motor oil and hydraulic fluid, letting them emulsify and lift away rather than just smearing across the surface. A domestic pressure washer running cold water can blast a stain around without actually removing much of it, and pushing the pressure up to compensate is how driveways end up with visible etch marks that are permanent.
Professional extraction pairs heat with targeted surfactants to reach contamination that DIY methods simply can’t touch, without the pressure levels that damage the concrete surface itself.
Bring in a professional when:
- The stained area covers a large driveway, warehouse floor, or car park rather than a single patch.
- A stain keeps reappearing after drying, which usually signals a recurring leak rather than a one-off spill.
- Runoff needs to be contained rather than washed into a drain or garden bed.
A typical professional job runs through a pre-clean, targeted chemistry matched to the stain type, hot-water extraction, and a follow-up check once the surface has dried.
Getting the concrete ready before you treat any stain
Every method above works better, and faster, on a properly prepped surface. Skipping preparation is one of the more common reasons a treatment that should work doesn’t.
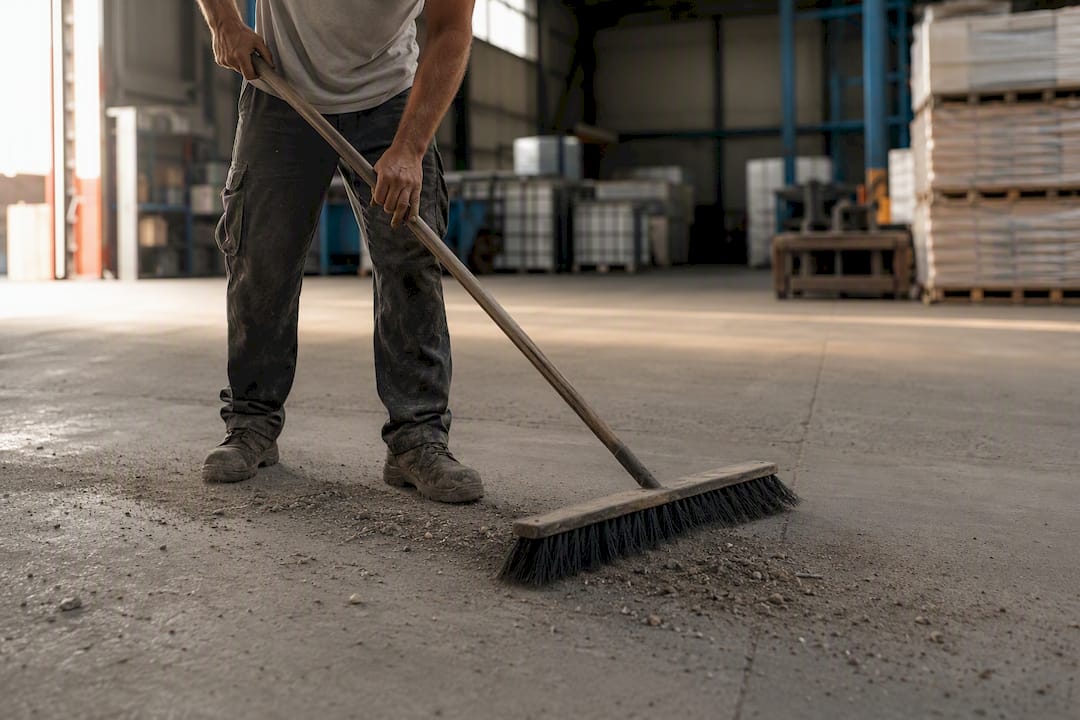
Start by sweeping the entire area to clear loose gravel, leaves, and grit. Debris trapped under a poultice or degreaser stops the product making full contact with the stain, and grit dragged around during scrubbing can scratch the surface. A stiff outdoor broom does this in a couple of minutes for most driveways.
Check the surface is dry before applying anything beyond the initial absorbent stage. Degreasers and poultice mixes are diluted by residual moisture in the concrete, which weakens their dwell time and cuts their effectiveness. If it’s rained in the last day or two, or the concrete still feels cool and damp to touch, give it another day before starting.
Temperature plays a role too. Warm, dry conditions improve chemical penetration and make repeat cycles more consistent, while cold or wet weather slows everything down and can leave a treatment only half finished. Late morning to early afternoon on a mild, dry day is usually the best window, avoiding the extremes of a hot midday sun that dries products out too fast or overnight cold that stalls chemical activity altogether.
Clear away any nearby items, garden hoses, pot plants, outdoor furniture, that could get splashed with degreaser or solvent during the process. It only takes a minute and it saves you from an unrelated cleanup afterwards.
Not all oil stains behave the same way
Motor oil, cooking oil, and hydraulic fluid all stain concrete, but they don’t respond to treatment the same way, and treating them identically is a common reason DIY attempts fall short.
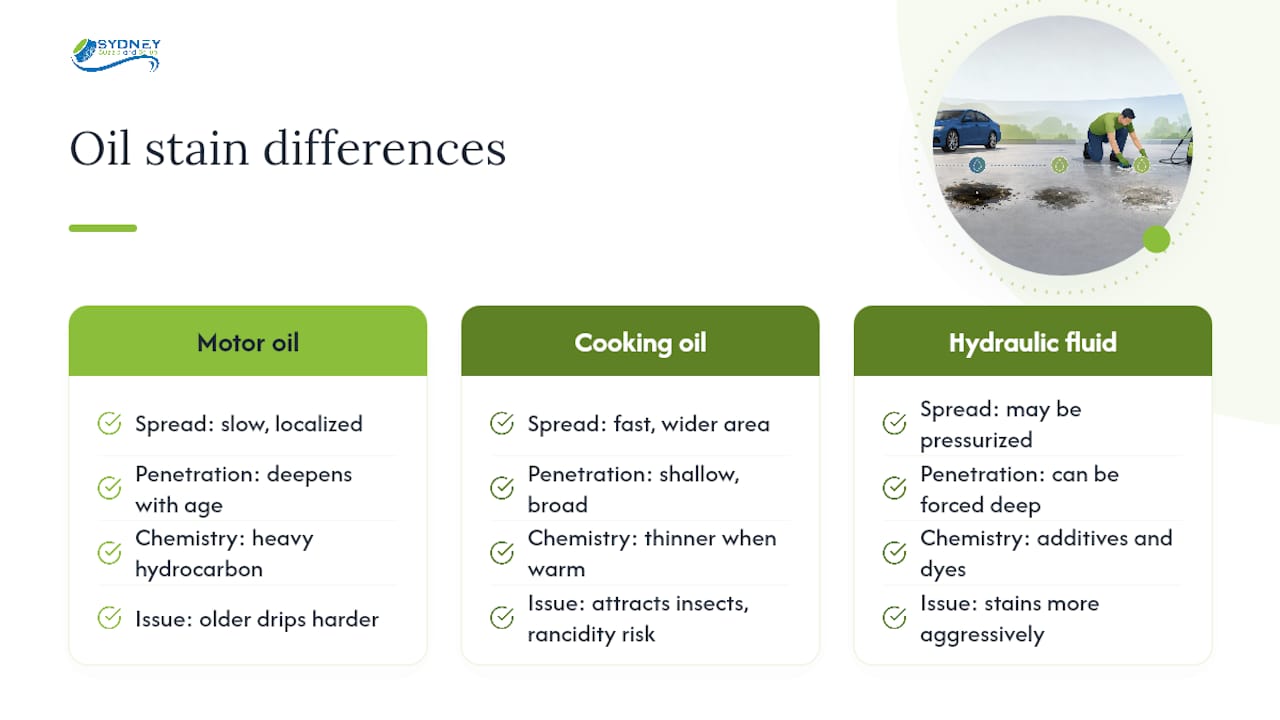
Motor oil is the most common driveway stain and the one most guides are written for. It’s a heavier hydrocarbon that penetrates steadily over time, which is why a drip that’s been ignored for six months is noticeably harder to shift than one caught within a day. It responds well to the age-based approach above: absorb, degrease, or poultice depending on how long it’s been there.
Cooking oil spreads faster on warm concrete because it’s thinner when hot, and it can leave a stain that looks lighter but covers a wider area than a motor oil drip of the same volume. It also tends to attract insects and go rancid if left untreated, so speed matters more here than with motor oil.
Hydraulic fluid, common around machinery, forklifts, and larger vehicles, often contains additives and dyes that stain more aggressively than plain motor oil. It’s also more likely to be under pressure when it leaks, meaning the contamination can be forced deeper into the concrete on impact rather than just sitting on the surface. These stains are more likely to need a poultice even when they look relatively fresh, and commercial sites dealing with hydraulic leaks regularly are often better served by a scheduled professional clean than repeated DIY attempts.
Mistakes that make oil stains on concrete worse
The gap between a stain that lifts cleanly and one that leaves a permanent shadow often comes down to a handful of avoidable errors.
Rinsing with water before absorbing the oil is the most common one. It feels like the obvious first step, but it spreads the oil sideways and drives it deeper into the concrete’s pores, turning a contained spill into a wider, harder problem.
Using a pressure washer on full power to “blast” a stain out is another. High pressure on unsealed or older concrete can etch the surface, leaving a rough patch that’s more visible than the original stain and can’t be reversed with cleaning products.
Scrubbing with a wire brush or anything metal scratches the surface and creates tiny grooves where oil settles even more stubbornly next time. Stick to stiff nylon or nylon bristle brushes.
Stopping too early is common with older stains. A poultice that looks like it hasn’t worked while the plastic is still on, or while the paste is still damp, often reveals a real improvement once it’s fully dried and scraped away. Judging results too soon leads people to abandon a method that was actually working.
Finally, mixing bleach with ammonia-based products, or with certain commercial degreasers, produces toxic fumes. Always check labels before combining products, and never assume “stronger together” applies to cleaning chemicals.
Tools and equipment worth having on hand
You don’t need a professional kit to handle most fresh and set-in stains, but a few specific items make the job considerably easier.
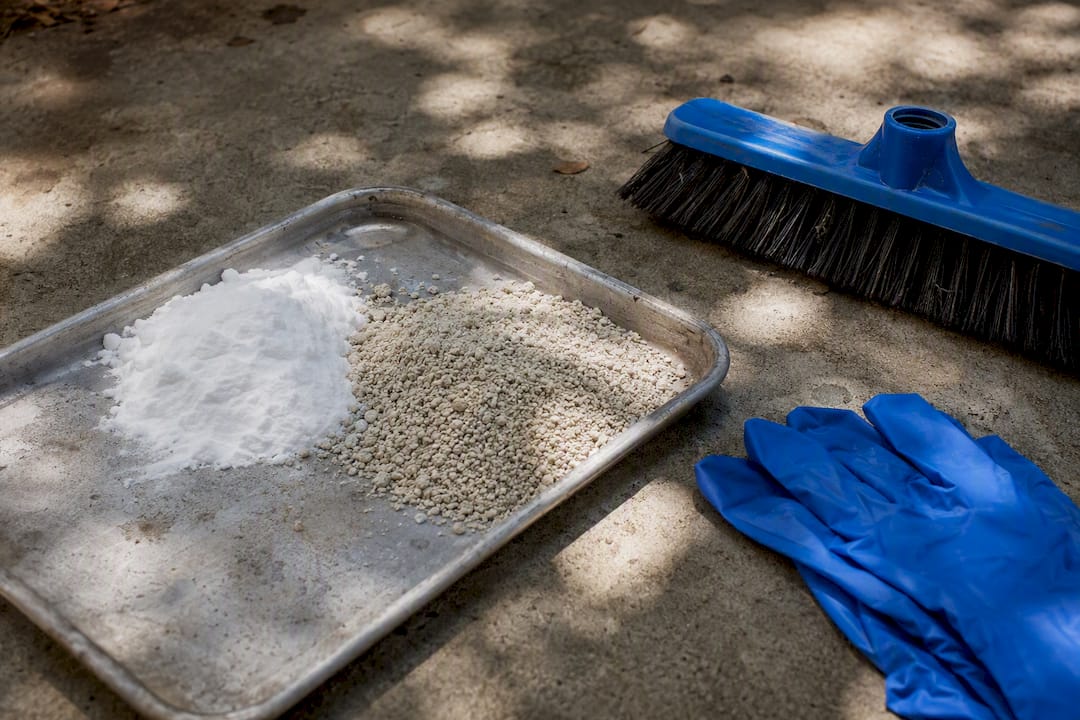
For absorption: clay cat litter or bicarb soda, a stiff outdoor broom, and a flat piece of timber or a brick for pressing the absorbent into the stain.
For degreasing: a concrete-specific alkaline degreaser or enzyme cleaner rather than a generic all-purpose spray, a stiff nylon bristle brush (not wire), a bucket, and a garden hose with a spray nozzle for the controlled rinse.
For poultice work: diatomaceous earth or fuller’s earth (or a premixed poultice product), a mixing container, a plastic putty knife or scraper for spreading and later removing the paste, and heavy plastic sheeting with tape to seal the edges.
Across every stage, nitrile gloves and safety glasses are worth having on hand, along with a sealable bag or container for disposing of contaminated absorbent and poultice waste. If you’re tackling a large area, a wet/dry shop vacuum speeds up both the initial oil pickup and the final rinse water collection, which also makes it easier to avoid sending oily runoff into a stormwater drain or garden bed.
Keeping oil stains from coming back
Prevention is cheaper than treatment, and most of it comes down to a few habits rather than expensive products.
Sealing bare concrete is the single biggest lever. A penetrating sealer fills the pores that oil would otherwise soak into, so a fresh spill sits on the surface long enough to wipe up rather than sinking straight in. Resealing every couple of years keeps that protection active, particularly in high-traffic areas like warehouse floors.
Drip trays under parked vehicles or machinery with known leaks catch the problem before it reaches the concrete at all, which is far easier than removing a stain later. If a vehicle is dripping consistently, get the leak fixed. No amount of cleaning keeps up with a steady drip.
Address every spill within the first hour if you can, using the absorb-then-degrease method from earlier. Treating stains while they’re fresh means you rarely need to reach for a poultice at all, and it keeps the concrete’s surface consistent instead of building up a patchwork of old, faded treatment zones.
How Sydney Sweep and Scrub handles stubborn oil stains
DIY methods handle most driveway spills, but large surfaces, recurring leaks, or oil that’s been embedded for years are a different job entirely. Sydney Sweep and Scrub runs hot-water pressure washing and mechanical scrubbing equipment built for exactly that scale, warehouse floors, car parks, construction sites, and driveways where a domestic hose and a tub of degreaser won’t cut it. Jobs include proper containment and waste management, so oily runoff doesn’t end up in a stormwater drain, and the equipment runs on eco-friendly, carbon-neutral operations rather than harsh solvents.
It’s the right call for large or persistent areas: a warehouse floor with years of forklift hydraulic drips, a car park with dozens of individual oil patches, or a driveway where the stain keeps returning no matter how many times you’ve poulticed it. Rather than working through repeat DIY cycles with uncertain results, you can request a quote or site assessment through the hard surface cleaning page and get a professional read on what the job actually needs.
Sources
- Poultice powder product page – Sealers Plus
- How to Remove Oil Stains from Concrete — Southside Supplies
Recommended
- Cleaning Your Concrete Before Line Marking – Sydney Sweep and Scrub – Commercial Cleaning – Carpark Cleaning – Warehouse Cleaning
- Post-Event Cleaning: Concrete Surfaces – Sydney Sweep and Scrub – Commercial Cleaning – Carpark Cleaning – Warehouse Cleaning
- Tips on Cleaning Your Concrete Event Space – Sydney Sweep and Scrub – Commercial Cleaning – Carpark Cleaning – Warehouse Cleaning
- Post-Construction Concrete Cleaning – Sydney Sweep and Scrub – Commercial Cleaning – Carpark Cleaning – Warehouse Cleaning